Tile Flooring Finishing Touches can really make a DIY project stand out and look professionally done.
Here are some key elements to consider.
Table of Contents
Shoe Trim (Base Shoe)
Shoe trim is used to cover the gap between the bottom of the baseboard and the floor. It’s often installed after the tile is laid and grouted.
Choose a trim that matches your baseboard for a seamless look.

Quarter Round Trim
Similar to shoe trim, quarter round trim is used to cover gaps between the floor and vertical surfaces like cabinets or walls.
It provides a finished appearance and helps to conceal any imperfections in the tile edges.
How useful was this post?
Click on a star to rate it!
Average rating / 5. Vote count:
No votes so far! Be the first to rate this post.
We are sorry that this post was not useful for you!
Let us improve this post!
Tell us how we can improve this post?


Transitions
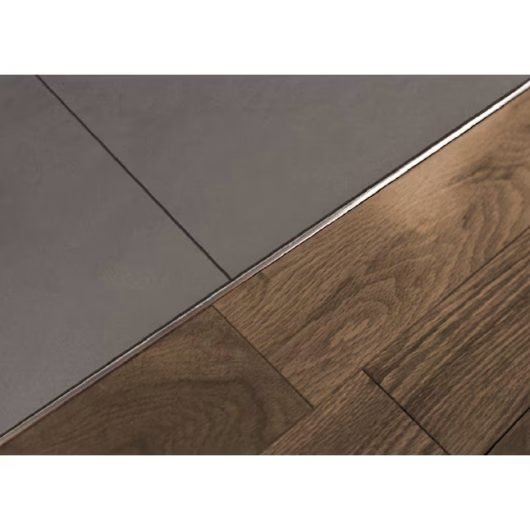
Transitions are essential where your tile floor meets another type of flooring (e.g., carpet, hardwood, vinyl).
Choose transitions that are appropriate for the height difference and type of flooring to create a smooth, safe transition between surfaces.


L-Angle Edge Trim
L-angle edge trim, also known as edge protection profiles, is used to cover and protect the exposed tile edge where it meets a different surface or where there’s a change in height. It enhances the durability and aesthetic of the tile installation.


New Floor Registers
Floor registers are probably the most visible feature on your new tile floor. Selecting floor registers for your new tile floor is a great opportunity to put an exclamation mark on your flooring project.
There are two trains of thought when it comes to floor register:
Blending In
-
Try to hide them by blending them into your new tile floor. This is usually achieved by a specialty company that takes one of your tiles and cuts it into a register. Once installed, it is hard to see it.


Making a Feature
- Make the register cover into a feature of your new floor. This is frequently done by finding an antique register cover or purchasing a vintage-looking grate.


Your decision should reflect the characteristics of your home and your personality. This is an opportunity to make your tile flooring project “Truly Yours”.
Both options above require significant pre-planning before you start your tile floor project, as they will require time to get manufactured or shipped.
If you find an antique register cover that you truly love, it may require changes to the size of the register opening to properly fit. Either way, it will certainly increase your project budget.
Make sure you consider your floor registers when planning the layout of your tile floor. For a step by step guide on how to layout your tile flooring project, check out SureReno’s DIY Guide: How to layout a tiles floor
Whichever register you choose, make sure they fit properly and are securely attached to avoid any gaps or instability.
Some register covers look good, however they also reduce the air flow, which can affect your home’s heating / cooling efficiency. For more information about, you can read this guide from the Canada Mortgage and Housing Corporation: Complying with residential Ventilation Requirements
Additional Tips
Caulking
- Use color-matched caulking to seal gaps between trim pieces and other surfaces (like walls or cabinets). This not only improves aesthetics but also helps prevent dirt and debris from accumulating in gaps.
Painting
- Touch up baseboards or trim with paint if needed to blend them with the new floor and ensure a cohesive look.
Cleaning
- Before installing any trim or transitions, thoroughly clean the tile floor and surrounding areas to remove any grout haze, adhesive residue, or dirt.
Conclusion
By paying attention to these tile flooring finishing touches, you can elevate the appearance and functionality of your DIY tile floor project, achieving a polished and professional result.
Now that your tile floor project, make sure you seal your grout. For guidance on ensuring your amazing tile floor project looks great for years to come, read SureReno’s article on, Tile Floors: Care and Maintenance.
Share this article:
How useful was this post?
Click on a star to rate it!
Average rating / 5. Vote count:
No votes so far! Be the first to rate this post.
We are sorry that this post was not useful for you!
Let us improve this post!
Tell us how we can improve this post?


