Laminate Flooring Installation & Tips
Installing laminate flooring can be a rewarding project for all homeowners, offering a cost-effective way to enhance the appearance and value of your home.
The largest advantage to laminate flooring (other than the look of course) is the durability. This makes it a particularly appealing option for those homeowners who may have pets, small children, or simply what to do it once and never have to worry about wear and tear. More details on durability from the North American Laminate Flooring Association (NALFA) can be found here.
Although it may be a more expensive option compared to vinyl, the durability and look it offers is comparable to hardwood which can come in at a much higher price point.


Laminate flooring can be installed with minimal experience or knowledge. It simply requires patience, sweat, and a little help from SureReno. Although using new tools or materials my seem daunting at first, can easily be installed by any inspiring DIY homeowner.
Here are some tips to help you with the process:
Table of Contents
Prepare the Sub-Floor
After removing all previous flooring (refer to our “old floor removal” article) the first step is to prepare the subfloor. Ensure the subfloor is clean, dry, and level.
Make any repairs that may be required. It is important to ensure the subfloor is secure and tightly fastened down. An unsecure subfloor is often the cause of creaks. We recommend putting additional screws every 12 inches along seams and joists. Speaking of screws, make sure all screws are sunk deep enough to prevent interfering with laying the laminate flooring.
Add floor leveler where required. Before beginning the next step ensure the floor is both clean and dry. For more knowledge on how to prepare your subfloor, refer to our “Steps to Prepare Your Subfloor”
Acclimate the Flooring
Allow the laminate flooring to acclimate to the room’s temperature and humidity for at least 48 hours before installation. The laminate will slightly expand and contract relative to its temperature.
Giving it time to do this before installation will help prevent warping or buckling after installation.
Choose the Right Underlayment
Install a suitable underlayment to provide cushioning, moisture protection, and sound insulation. Foam or cork underlayment are popular choices for laminate flooring.
Make note that some laminate flooring options come with the under already secured to the bottom of the boards.
For more details on underlayment, check out our special article covering all you need to know on this topic.
From Idea to Completion, Renovate with Confidence
Gather the Necessary Tools
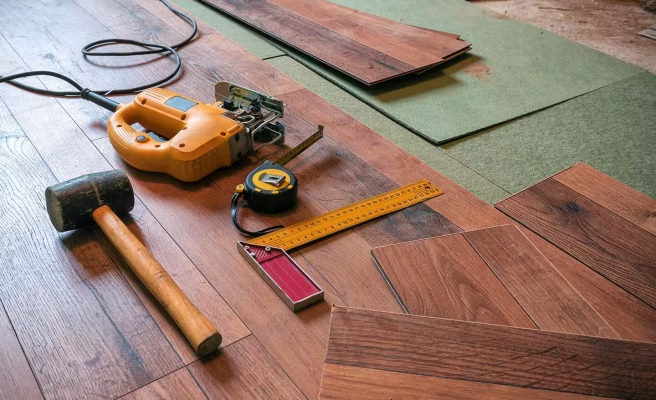
Make sure you have all the tools you need for installation, including:
- a saw (circular saw or jigsaw),
- tapping block,
- spacers,
- hammer,
- utility knife,
- tape measure, and
- safety gear.

Start with a Clean Slate
Begin installation in a corner of the room, starting from the longest wall.
First remove the baseboards. If you already love your baseboards or simply have a strict budget, a shoe mold or quarter round will be required.
Next, undercut the door jambs. Placing boards under the door jam instead of against it will provide a more professional and clean finish.
Finally, cut down your doors as needed to ensure they will swing freely over the new laminate floor.
Follow Manufacturer's Instructions
Each laminate flooring product may have specific installation instructions provided by the manufacturer.
Follow these instructions carefully to ensure proper installation and warranty coverage.
Mind the Expansion Gap
Leave a small expansion gap (usually around 1/4 inch) around the perimeter of the room to allow for natural expansion and contraction of the flooring.
Stagger the Joints
When installing the laminate planks, stagger the end joints at least 6 inches between rows to ensure a stable floor.
A popular method of staggering is to use the piece you cut off at the end of the last row to start the next row. This will reduce waste and create a visually appealing look.

Use Proper Techniques
Use a tapping block and hammer to gently tap the planks together, ensuring a snug fit without damaging the edges.
Avoid tapping directly on the planks to prevent surface damage. A rubber mallet may be handy to further reduce risk of any damage to the planks.
Trim Excess Underlayment and Install Baseboards
Once the flooring is installed, trim any excess underlayment and reinstall baseboards. Use finishing nails and adhesive to secure the baseboards in place.
Take Your Time
It will take time to develop a rhythm and learn the small tips and tricks that can only be obtained from doing the process.
It is your floor and you want to still love it in 10 years from now, so don’t rush it.
Regular Maintenance
After installation, follow the manufacturer’s recommendations for cleaning and maintenance to keep your laminate flooring looking its best for years to come.
Relax and Enjoy!
You worked hard, learned a new skill, and maybe most importantly, saved money by successfully installing your own laminate flooring.
It’s time to relax and enjoy your newly refreshed living space.
Conclusion
By following these tips and taking your time with the installation process, you can achieve a beautiful and durable laminate flooring finish in your home.
We wish you luck and remember, don’t be intimidated. Every professional started somewhere and with a little patience you can transform your living space into your dream space.
Share this article:


